This simple pattern modification can be used to add extra ease to the seat area of a princess seam garment, such as the Forester Coat, Trailblazer Vest, and Women's/Curved Fit Pathfinder Vest.
This adjustment works best if your hip and seat fullness is mostly distributed to the rear of your body, and will allow extra ease exactly where it's needed without impacting the fit of the garment elsewhere.

Materials
- Pattern pieces (Centre Back and Side Back pattern pieces)
- Measuring tape
- Scrap paper
- Tape
- Ruler
- Pencil
Measure
Determine how much ease to add to the back pattern pieces of the vest or coat by comparing your actual hip measurement to the finished measurement chart for your size. The difference between the sizes is the amount you will need to add into the pattern.
If you have fullness at the sides as well as the back you may want to do a combination of size blending for the hip (as outlined in the pattern tutorial) as well as using this tutorial to add extra ease specifically into the back panel seams. If you do blend out at the sides first, remember to subtract this from your total pattern adjustment amount.
For this adjustment, we will be working on quarters of the pattern pieces, so we will divide the total amount to add by 4. In our example, we will add 2" (5cm) into the pattern, so it will be 1/2" (1.3cm) per pattern piece.
Adjust pattern pieces
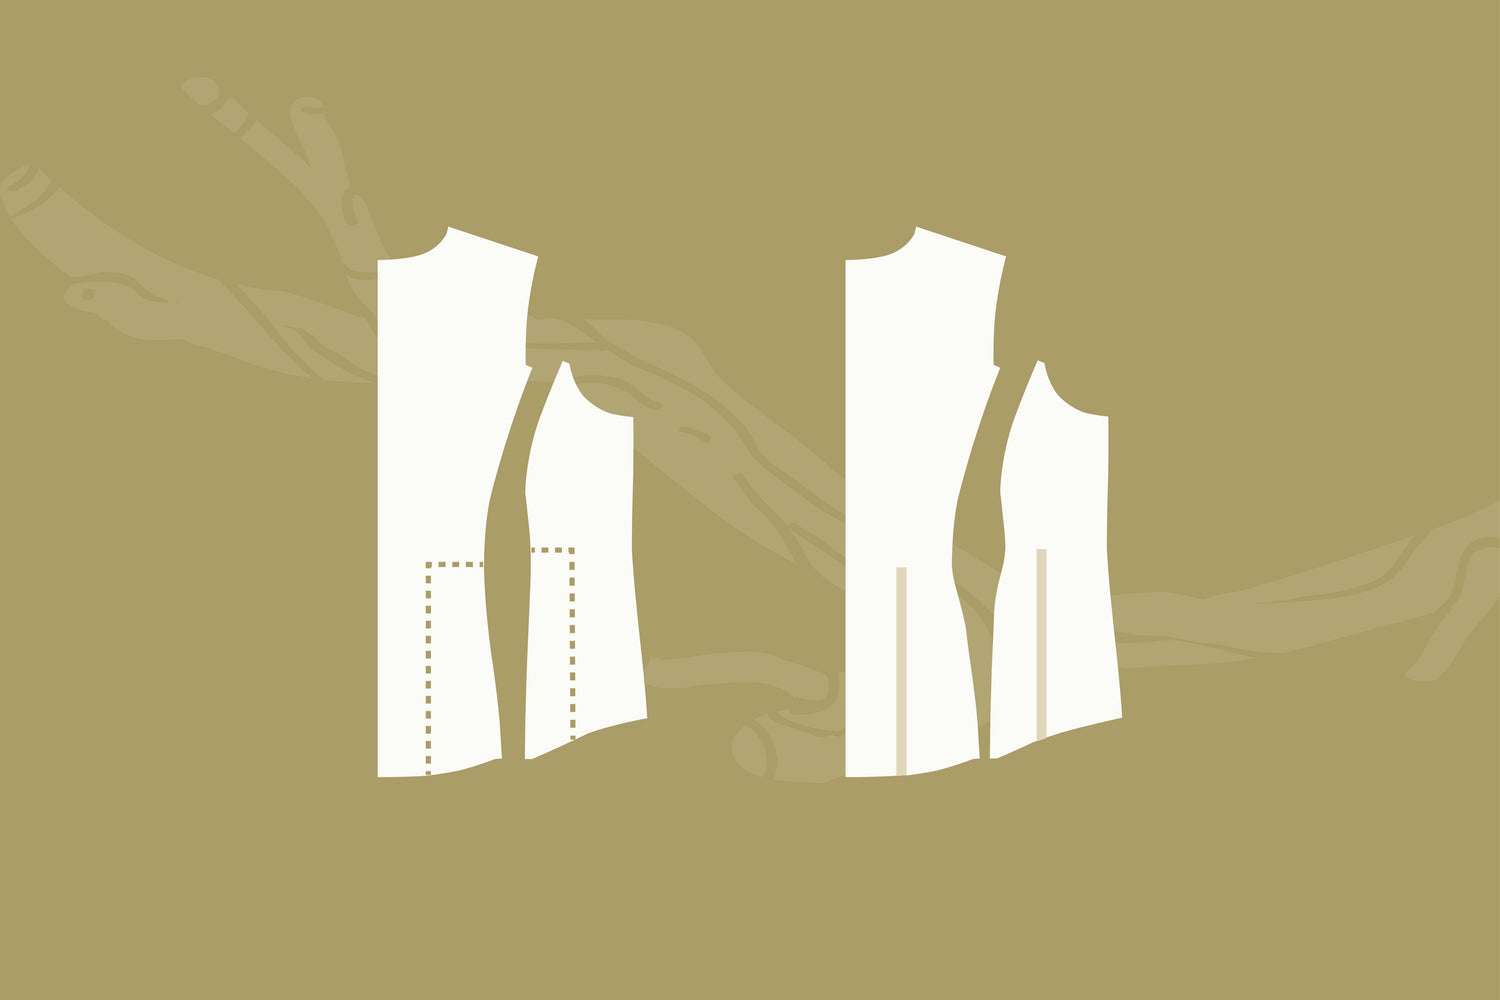
1. On the Centre Back and Side Back pattern pieces, draw a line parallel to the grainline from the lengthen/shorten line to the hem. Cut through this line and across the lengthen/shorten line towards the curved princess seam.

2. Slide the cutout section out (away from the pattern piece) by the pattern adjustment amount. In our example this is 1/2" (1.3cm).

3. Blend the curved panel seams and hems with a smooth line.

Continue to sew your garment as outlined in the pattern tutorial using your newly-adjusted pattern pieces. Enjoy wearing a vest or coat with a custom fit!

Read more pattern fitting tutorials here:


