Materials
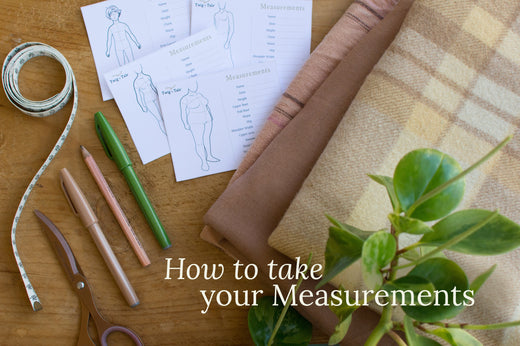
Gather some basic materials to adjust the pattern pieces:
- Bib and Side Strap pattern pieces
- measuring tape
- scrap paper
- sticky tape
- ruler
- pen/pencil
- scissors, craft knife or roller cutter intended for paper
Measure
First, check the finished measurement chart in the tutorial for the shoulder to waist length. Apply this measurement to your body. If the measurement is too short for where you want the waistband to sit, then make note of the difference between your body and the pattern measurement. Use a mirror if taking this measurement yourself.
The bust apex position is marked on the bib with a placement marker. You can choose to ignore this if you wish, but it is useful for knowing where to shape your side straps. Measure your bust apex from your shoulder to the fullest/most prominent point of your bust.
Checking while wearing the undergarments you intend to wear most often with the pinafore (or no undergarments if you believe that will be your most frequent combination) will help get the best fit.
Adjust pattern pieces
Please note: The following diagrams show the Pleated Bib version of the Wildflower Pinafore, however the instructions for the Classic Bib will be the same.
1. Lay the Side Strap next to the Bib, matching the notches, and measure the bust apex position on the pattern from the shoulder to the placement marker. If there is a difference note this down.

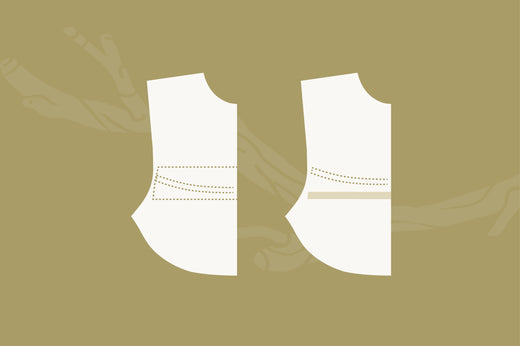
2. To add length to the Bib, split the Bib and Side Strap through the lengthen/shorten line. Place scrap paper under the pattern pieces, and move the bottom sliced off pieces away from the top sections by the amount noted in the first step.

3. Secure in place, taping the new positions down to the scrap paper.
Smoothly join and blend the lines to create two new full pattern pieces.

4. At this point, it's a good idea to make a quick muslin/toile to check the fit of the Side Strap as, depending on your bust shape, you may find that lengthening the pieces alone causes some gape.
If your Side Strap is gaping then pin out the extra fabric at the point of your full bust/bust apex. This will create a temporary dart on either side of the Bib.

5. Pop a pin or make a mark at the point where your temporary dart ends.
Measure the amount of fabric you pinned out of the sides at the outer edge - don't unpin the muslin at this stage!


7. Shorten your Side Straps by the pinned out amount. Tape the pattern down to secure in place.

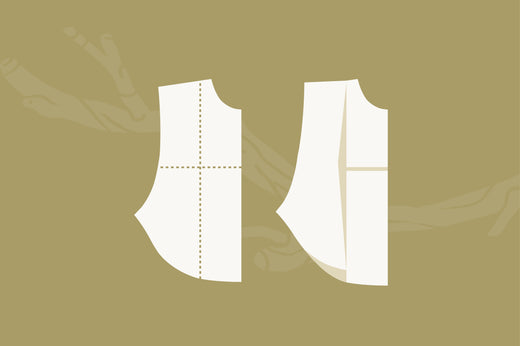
8. On the Bib piece, shorten the side of the Bib by the same amount you took out of the Side Strap (so that they still match). BUT, you don't want to shorten the Bib all the way across or you are back where you started! In order to achieve this, you will now pivot this area into the pleat. The pleat will become deeper, but that will help keep the pleat as a feature.
Mark a line from the side of the Bib pattern, beginning where the temporary dart was pinned on your muslin, to the point where your dart ended. Pivot, and draw a line from the dart end, down to midway between the pleat notches.
Cut along each line from the side and bottom to the pivot point, leaving a small amount of paper at the point to act as a hinge.

9. Measure the amount you pinned out on your muslin at the sides of the Bib. This will be a smaller amount than that pinned out at the outer edge of the side straps.
Place scrap paper beneath, and using the pivot point, swing the sliced pattern piece up the smaller measured amount at the side Bib. Secure this new position of the pivoted piece.

10. Blend the side and bottom edges smooth and you are ready to cut!


Read more related adjustment and how to tutorials here:


