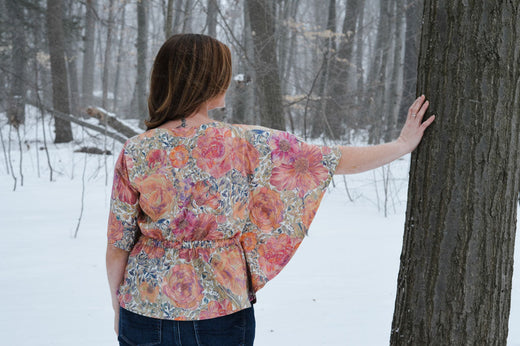
For wider necked garments, such as the Twig + Tale Cascades Top, it is sometimes troublesome for a wayward bra strap to visibly slip into the neckline when it was not intended to do so. For this eventuality, you may find installing a bra keeper helps very neatly and economically address this situation!
Also known as a bra strap holders, bra strap guards and bra strap tamers, a bra keeper consists of a little channel concealed inside your garment at the shoulder seam.
For this tutorial, we will cover two methods of creating a bra keeper, including using a thread chain, bias binding or ribbon, on a completed garment. You may choose to attach a bra keeper before the garment is finished, but this way allows you to finesse the position of the channel.
Materials
- Thread to match your garment
- optional: ¼ - ½" (6mm - 1cm) grosgrain ribbon or twill tape
- optional: ¼ - ½" (6mm - 1cm) bias binding
- hand sewing needle
- two sets of 2/0 (7mm) press studs/snap fasteners*
- scissors (or snips for thread chain keeper)
- ruler
- air erasable or similar marking tool
- optional: beeswax or similar thread conditioner
You can make your own bias binding strip with the same fabric as your garment, or with discarded textiles! See our tutorial blog post, How to Make Bias Tape from an Upcycled Dress Shirt to find out how! If making your own, using a lightweight fabric works best to minimise show through and bulk in the shoulder seams.
*You may use different sized press studs/snaps if that is what you have available. Bear in mind that smaller press studs/snaps may not be as secure, and larger ones are likely to become too noticeable and bulky to attach.
Mark Keeper Positions
- Making sure to wear the bra you intend to wear with the garment, and that the straps are sitting where they naturally sit on your body - shrug your shoulders and move around a bit to let them settle. Turn your garment inside out and put it on.
-
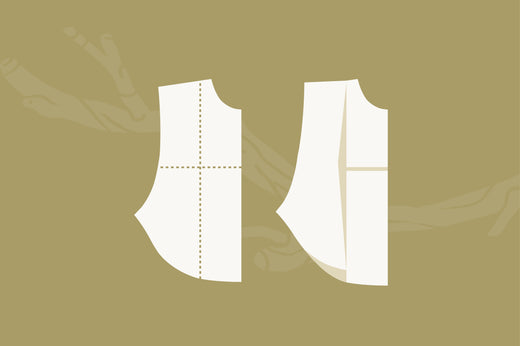
Using an air erasable or similar marking tool, feel where your bra straps are sitting at the shoulder seam, and mark each side of each strap. Allow around 1" (25mm) of space between your marks.
Change back out of your garment to begin.
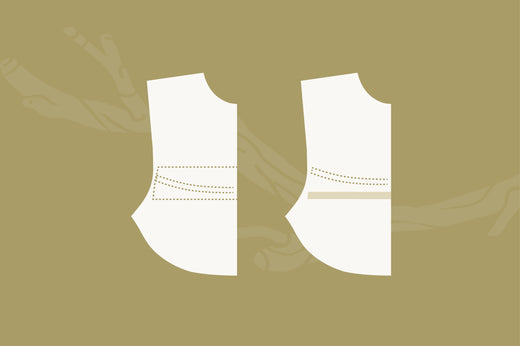
If you are adding a bra keeper for a gift or to a garment that is not yet finished, mark a line approximately 1" (25mm) in from the neckline edge, not including the seam allowance. Then mark a second line at least 1" (25mm) away from the first, towards the armscye, you can make the keeper wider if you so desire.
If the neckline is quite wide you, may alternatively mark a line just inside of the neckline seam allowance, and then the second line at least 1" (25mm) away from the first.
Thread Chain Method
-
Thread your needle, optionally treat your thread with beeswax to help prevent tangles. Using the thread double, stitch the post half of a press stud/snap to one side of a marked line, closest to the neckline.
For a lined garment, simply ensure that you are stitching through the lining only, so that there is no show through on the right (public) side. Otherwise, stitch your press stud/snap post to the finished seam allowance - for a Cascades Top this will be the French seam at the shoulder.
- To create a sturdy thread chain, cut two lengths 28" (around 70cm) of thread, and holding them together, thread your needle so that it becomes four threads. As before, optionally treat your thread with beeswax to help prevent the threads knotting with each other. Create a few backstitches on the far side of the other mark along the shoulder seam to secure the thread, you may also sew a knot if you so desire.

-
Sew a thread chain until it is long enough to comfortably reach the press stud/snap fastener post. Pull the needle through the loop and pull firmly to close the thread chain.
- Stitch the socket half of the press stud/snap fastener pair to the thread chain, through only one of the holes on the socket. Stitch through the hole up to half a dozen times, and stitch back through the top of the thread chain to help anchor the socket. Stitch three or more knots into the thread chain to secure. Trim all your thread ends.

- One thread chain bra keeper complete!

Repeat for the other side.
- Now you can snap your bra strap in place while wearing your garment - just remember to unsnap the keeper before taking your garment off.
Bias Binding or Ribbon Method
- Prepare your bias binding or ribbon.
Measure the distance between the your marks and add around 1" (25mm) for seam allowance and a little wiggle room.
Double this total length to calculate how much bias binding you will need to sew closed to form a tube. Press flat and cut in half to achieve two channels.
OR
Cut two ribbon lengths the calculated length above. -
Mark an ⅜ " (1cm) seam allowance at each end of your bias binding/ribbon.

-
Thread your needle, optionally treat your thread with beeswax to help prevent tangles.
- Place your bias binding/ribbon, onto to mark on the the armscye side of a shoulder seam. The mark on your binding/ribbon should be positioned so that it is just outside the mark on your garment. Using the thread double, securely stitch the binding/ribbon in place.

For a lined garment, simply ensure that you are stitching through the lining only, so that there is no show through on the right (public) side. Otherwise, stitch your binding/ribbon to the finished seam allowance - for a Cascades Top this will be the French seam at the shoulder.
-
Optional: You can take this opportunity to stitch the seam allowance of your binding/ribbon back to itself to finish that allowance before breaking your thread.
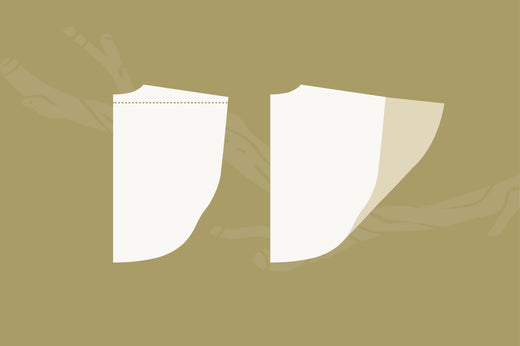
- Fold the free end of the binding/ribbon towards the wrong side at the marked line. Hand stitch the end down to secure and finish the end.
Ensuring that you are using the thread double, stitch the socket half of a press stud/snap onto the folded and finished seam allowance.
- Smooth the binding/ribbon along the shoulder seam towards the neckline, and double check where the post half of your press stud/snap should sit on the garment. Securely stitch the post in place.

- One bra keeper complete! Repeat for the other side.

- Now you can snap your bra strap in place while wearing your garment - just remember to unsnap the keeper before taking your garment off.
If you have any questions about adding bra keepers or sewing and adjusting Twig + Tale patterns, please feel free to join us at the Twig + Tale Facebook group.

Read more pattern tutorials at the following links: